- Worsted Weight Yarn. 4 colors: Pink, Light Pink, Fuchsia and Black.
- 4mm Crochet hook.
- Cushion Stuffing.
- Scissors & needle.
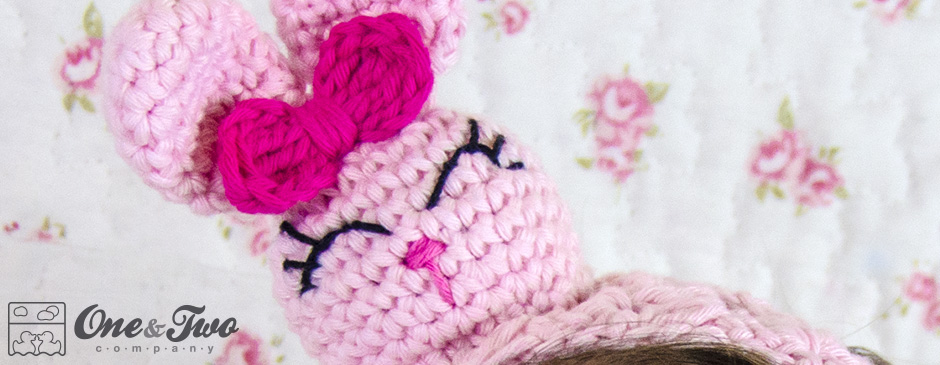
Olivia the Bunny Headband FREE Crochet Pattern
Materials
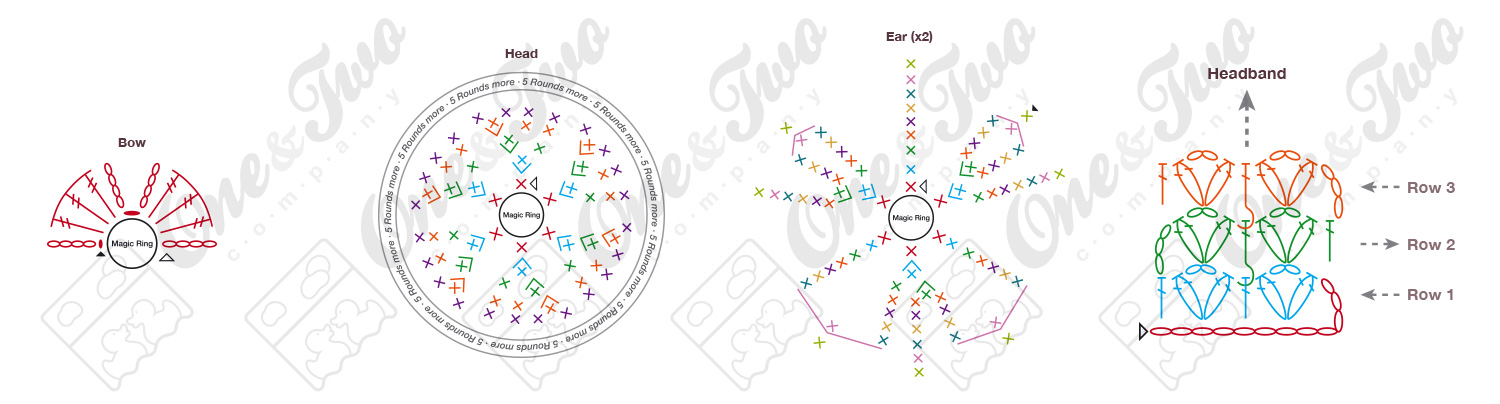
Head
Start:
This parts is worked continuously. You should use a stitch marker. With Light Pink yarn create a Magic Ring with 6 sc.
Round 1:
2 sc in each sc. Join.
Round 2:
* 1 sc in next sc, 2 sc in next sc * repeat 5 more times (18 sts).
Round 3:
* 1 sc in next 2 sc, 2 sc in next sc * repeat 5 more times (24 sts).
Round 4 to 9:
1 sc in each sc (24 sts, 6 rounds in total). Fasten off and leave a long tail for sewing that piece later.
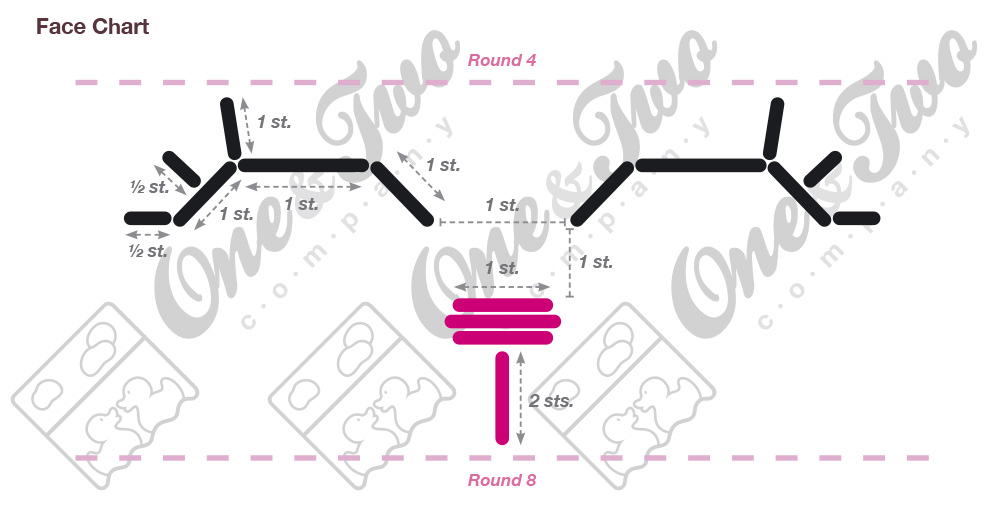
Face
Now you must look at the chart below to know how to make Bunny Face. You will need Black and Pink yarns.
Ear
Start:
This part is worked continuously. You should use a stitch marker. With Light Pink yarn create a Magic Ring with 6 sc.
Round 1:
* 1 sc in next sc, 2 sc in next sc * repeat 2 more times (9 sts).
Round 2:
* 1 sc in next 2 sc, 2 sc in next sc * repeat 2 more times (12 sts).
Round 3 to 6:
1 sc in each sc (12 sts, 4 rounds in total).
Round 7:
* 1 sc in next sc, sc2tog * repeat 3 more times (8 sts).
Round 7:
1 sc in each sc (8 sts). Fasten off and leave a long tail for sewing that piece later.
Join the open edges of the ear and sew them, working with the 2 loops of each part.
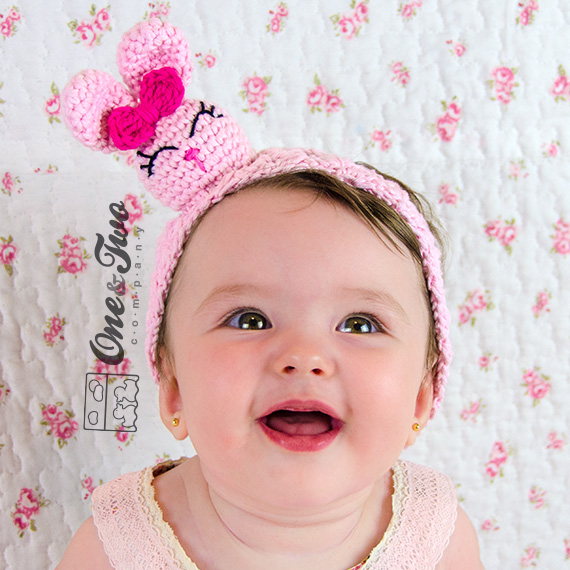
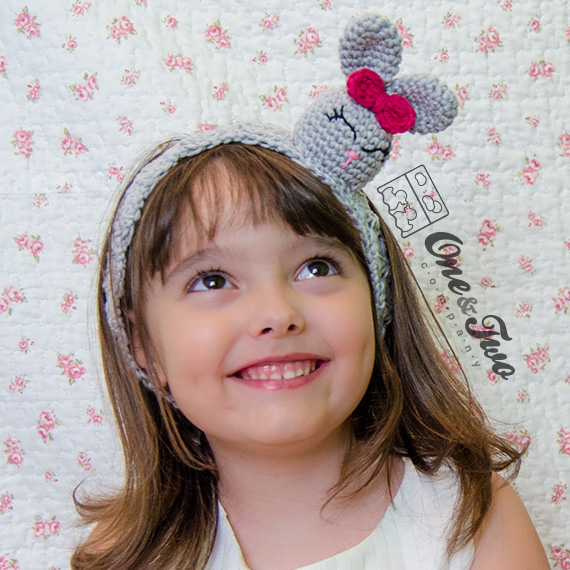
Now sew the ears on the head. Place them centered, between rounds 1 and 2 of the head. For your reference the ears have no distance between them. Look at the photographs to help you. Fasten off.

Bow
Start:
With Fuchsia yarn create a Magic Ring with 4 ch, 3-trc cluster stitch, 4 ch, 1 sl st, 4 ch, 3-trc cluster stitch, 4 ch and 1 sl st.
To finish the bow, with Fuchsia yarn, pass a yarn around the center several times. Fasten off and leave a long tail for sewing that piece later.
With Fuchsia sew the Bow to the head. Place it centered between the two ears. Fasten off.
Headband
Start:
With Light Pink yarn do 12 ch.
Row 1:
(2-dc cluster stitch, 2 ch, 2-dc cluster stitch) in 6th ch from hook, skip next ch, 1 dc in next ch, skip next ch, (2-dc cluster stitch, 2 ch, 2-dc cluster stitch) in next ch, skip next ch, 1 dc in last ch, turn.
Row 2:
3 ch, (2-dc cluster stitch, 2 ch, 2-dc cluster stitch) in next 2 ch space, 1 fpdc in next dc, (2-dc cluster stitch, 2 ch, 2-dc cluster stitch) in next 2 ch space, 1 dc in top ch from previous row, turn.
Newborn:
Repeat Row 2: 21 times.
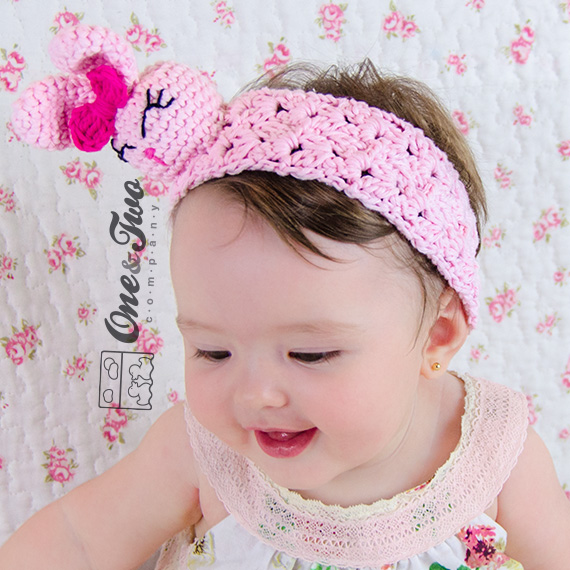
Your headband should have 24 rows in total. Its length will be 14 inches approx.
6-12 months:
Repeat Row 2: 26 times
Your headband should have 27 rows in total. Its length will be 16 inches approx.
Toddler:
Repeat Row 2: 30 times
Your headband should have 31 rows in total. Its length will be 18 inches approx.
Child:
Repeat Row 2: 33 times
Your headband should have 34 rows in total. Its length will be 20 inches approx.
Adult:
Repeat Row 2: 36 times
Your headband should have 37 rows in total. Its length will be 22 inches approx.
Finishing the Headband
All the sizes have a Last Row.
Last row:
1 ch and 1 sc in next dc, 1 sl st in next 2 ch space, 4 ch, 1 sl st in next 2 ch space, 1 sc in next top ch from previous row. Fasten off.
Now sew a wood button at the other end of the Headband.
Finally stuff the head. Then, with Light Pink yarn sew the Bunny Head to the Headband. I sewed mine 3 inches to the left of the center of the headband. Fasten off.
Chart: Olivia the Bunny Headband
Each round/row has a different color.
Symbols:
-

Start
-

End
-

chain
-

sc
-

2sc
-

sc2tog
-

hdc
-

dc
-

trc
-

sl st
-

Knot
& Loop
Images